Introduction
LooToGo boasts a straightforward yet robust scripting language, employing text files containing command lists associated with Script Markers, keyboard shortcuts, MIDI events, or buttons. These scripts serve to expand the software’s functionality beyond its native design, enabling users to combine shortcuts, create dynamic song templates, and customize the looper’s behavior. Script files are identified by the .ltgs or .txt extension, empowering users to tailor LooToGo to their specific needs and preferences.
Warning: Scripts are to be used by LoopToGo advances users. We suggest that you get familiar with LoopToGo standard functionalities before using scripts. Also, scripts can be very demanding in CPU and or memory when not used properly. It is even possible to make LoopToGo crash with a script (Example: a never ending for-loop or while-loop without and « wait » command). Never use a script in a live performance if the script has not been thoroughly tested before. Don’t hesitate to contact us if you need help to write specific scripts.
Different ways to execute a script
Button
You can create a Script Button that will execute a script when pressed. The button will be added to the Script Button Panel (located at the left of the Looper View) and to the Script Buttons Window. You can select to individually show or hide the Script Button Panel and the Script Button Window in the View Menu. Contrary to the other way to execute a script (Marker and Event), a script associated with a button will be loaded each time the button is pressed.
To change the color of a script button, in the Button Script Dialog, press the Example button located top right. A Choose color dialog will be shown, simply click on a color.
Script Marker
The commands are executed when the song tick reach a Script Marker while the song is playing or recording. To create a Script Markers, create a Marker (see the help page) and check Script Marker then choose a script file and, optionally, add arguments that will be passed to the script. Alternatively, you can use the Manage Scripts Dialog Window to create a Script Marker. Note that for Script Markers, the list of commands is loaded in memory when the script is associated to the marker. If you edit the script file, you have to reload the script in memory (Scripts/Reload all scripts or edit the marker). For this reason, it could be more efficient to use the Manage Scripts Dialog Window to develop and test the script before associate it to a Script Marker. If the script is already running, it won’t start again.
Keyboard shortcut or midi event
The commands are executed when the event occurs. To associate a script with an event, use the « Scripts/Link Script to midi or keyboard event » menu. Alternatively, you can use the Manage Scripts Dialog Window. Note that for Keyboard shortcuts or midi events, the list of commands is loaded in memory when the script is associated to an event. If you edit the script file, you have to reload the script in memory (Scripts/Reload all scripts or edit the event with Scripts/Manage scripts). For this reason, it could be more efficient to use the Manage Scripts Dialog Window to develop and test the script before associate it to a shortcut or midi event. If the script is already running, it won’t start again.
Note: It is suggested to use the ALT modifier to assign script to keyboard shortcut (Example ALT-L). As a matter of fact, LoopToGo default shortcut are assigned to CTRL and SHIFT modifiers and not ALT modifier. The only exception are ALT-1, ALT-2, etc. which are used for muting and unmuting tracks and ALT-Right and ALT-Left. If you still prefer to use a CTRL or SHIFT modifier, make sure to unassigned the default shortcut.
Auto start
It is possible to automatically starts a script when LoopToGo starts or when a song is loaded. To do so, create a file named autoStart.ltgs in {user}/Documents/Scripts or in {user}/Documents/Songs/{Song folder} respectively. It is recommended to use the loadScript or loadScriptDynamic commands inside autoStart.ltgs instead of putting the actual script commands for more reusable scripts. Note that the script launched when a song is loaded will stop when a new song is created or loaded.
Auto exit
It is possible to automatically starts a script when LoopToGo exits or when a song is closed. To do so, create a file named autoExit.ltgs in {user}/Documents/Scripts or in {user}/Documents/Songs/{Song folder} respectively. It is recommended to use the loadScript or loadScriptDynamic commands inside autoExit.ltgs instead of putting the actual script commands for more reusable scripts. Note that it is recommended to keep these scripts short as LoopToGo might kill them if they are too long.
Loop Scripts
Scripts can be executed when entering or leaving a loop. To set this up, follow these steps:
- Open the loop’s Properties dialog window.
- Choose a script for either « Entering a loop » or « Leaving a loop ».
For a record loop, you also have the option to call the corresponding scripts for the linked play loops. If you select a script for a play loop and the associated record loop has this option enabled, both scripts will be called.
When a script is called the following System Variables are set:
- $loopEvent: « Enter » or « Leave »
- $eventLoopID: ID of the loop that triggered the event
- $scriptLoopID: IF of the loop where the script is defined. Will be different from $eventLoopID if the is triggered from a play loop but the script was provided from its linked record loop (where the « Also apply to linked loops » option is checked).
DEPRECATED but still valid when the argument field is empty: A script called when entering or leaving a loop will receive the following arguments:
- Argument 1: « Enter » or « Leave »
- Argument 2: Loop ID (loop for which an event is triggered)
- Argument 3: Calling Loop ID (if different from « Loop ID », it means, this is the ID of the record loop from which the script is called)
- Argument 4: Loop start bar value
- Argument 5: Loop end bar value
Note that these events can occur even when the playhead is not at the beginning or the end of the loop. For example, this can happen when the user clicks inside or outside the loop or when the playhead enters or exits the loop due to a jump. It is the responsibility of the script to check the song’s state (playing, recording, paused, or stopped) and the position of the playhead within the loop to determine the appropriate action.
Additionally, note that a script may be called up to 5 milliseconds (or more, depending on computer specifications) after the events. Therefore, it is not suitable for actions that need to be executed immediately at the beginning or end of the loop.
The script manager
The Script Manager is a powerful tool designed to help create, edit and debug a script. Furthermore, it is very easy to setup the way a script will be used from the « Script Manager.Select Scripts/Manage scripts… ». To launch the Script Manager.
Getting Started – running your first script
To create a script, select « Scripts/Manage scripts… ». Then click on « New script… ». Windows will prompt you to select an application to edit your script file. Choose any text file editor. Notepad can be used at first but you might want to use a more advanced editor as you create bigger scripts.
Note: we suggest that you use Notepad++ for editing LoopToGo’s scripts. An auto-format file as well as an auto-completion file are provided to ease the writing of scripts. See Editing Scripts Appendix for more details.
In the text editor, type the following line:
Input
printInMessageBox "Hello world!"Output
Hello worldThen save the file. You should see the file listed in the Script Browser section. Select the file and hit « Run selected script ». A Message Box should appear showing « Hello word! ». You are now ready to create more interesting scripts.
Syntax
The script syntax is very simple. Each line is either empty, staring with a command or starting with the comment symbol (//). Empty and commented lines are ignored. Commands may be followed by arguments. Arguments might be mandatory or optional. You will find the list of commands in Appendix A but you have to know some basics commands before starting to write your own script. We suggest that you read the sections below and try the example to get use to the script syntax.
Unknown commands will make the Error/Log console popup and show an error message when loading a script.
Note: commands are case sensitive.
Note: it is suggested to use the « Manage Scripts » window to test the examples below.
File extensions
File extension for script could be .ltgs or .txt. You can use either extension but the .ltgs is recommended since some text editor can be configured for syntax highlighting. Also, file with the .txt exetsnion wont be shown in the script browser. This can be useful to use the .txt extension for utility scripts that are not standalone (must be called by other script such as aliases.txt, see below).
Comments
The double backslash (//) is used to comment a line or a part of a line.
Example:
Input
// This line is commented

print "Hello world!" // A comment
Output
Hello world!The « alias » command
Similar to the variable command (but still different), the alias command is used to make the code clearer by replacing any text by other text. Unlike the variable command, the alias command is used without the symbol $.
Important note: the alias command (unlike the variable command) is interpreted when the script is loaded, not at runtime.
For example, say that you want to write a script that will start recording, wait 2 bars, then stop. The script could be:
shortcut "Ctrl+Space"
waitDelta 2
shortcut Q
However, the first and third lines are not really meaningful and you could forget what they do when you edit this script later on. Here is an alternative using the alias command:
alias record 		shortcut "Ctrl+Space"
alias stop 		shortcut Q

record
waitDelta 2
stop
As you can see, the script is now easier to understand. Furthermore, you can write all your aliases in a file and use the loadScript command to use them in all your scripts. Here is an example of what a aliases.txt file could be:
// Aliases from shortcuts
alias play 		shortcut "Ctrl+P"
alias stop 		shortcut Q
alias record 		shortcut "Ctrl+Space"
alias setTickHere 	shortcut V
alias toggleGoTo	shortcut G
alias newSong		shortcut "Ctrl+N"
alias jamMode		shortcut J
alias erase		shortcut E
alias outOfJamMode	shortcut O
alias selectChain1	shortcut "Ctrl+1"
alias selectChain2	shortcut "Ctrl+2"
alias selectChain3	shortcut "Ctrl+3"
alias selectChain4	shortcut "Ctrl+4"
alias jumpSection1	shortcutByID 23528
alias jumpSection2	shortcutByID 23529
alias jumpSection3	shortcutByID 23530
alias jumpSection4	shortcutByID 23531
And the previous example will be:
loadScript aliases.txt

record
waitDelta 2
stop
Note that loadScript will insert the script file inside the current script at load time. It is equivalent to copy the content of the loaded file into the current script.
The « print », « printInMessageBox » and « printInBlockingMessageBox » command
The print and printInMessageBox commands are used to output information to the user. These commands can take up to 15 arguments (15 is the maximum for all commands).
The print command will write the arguments to the Error/Log console if visible and to the Manage Scripts/Error/Log Console if visible. All arguments will be separated by one space. If both windows are not visible, the message will be lost. This behavior is to avoid using too much memory. If one of the arguments contains ERROR, the Error/Log console will pop up and show the message in bold red.
The print command is mainly used for debugging purpose and error messages.
The printInMessageBox is used to display informations to the user by showing a window
The printInBlockingMessageBox has the same syntax of print but will display the message in a dialog and wait for the user to press ok. It is used to give informations to the user and to pause the script until the user press OK.
Input
print "Hello World!"
print How yo you do?
Output
Hello World!
How yo you do?
The « variable », « globalVariable » and « parentVariable » commands
The variable, globalVariable and parentVariable commands are used to create dynamic values (values that can be changed) in a script. Here are the difference between these commands:
A variable command creates or modifies a variable that « exists » only in the context of a script and all its children if any. It is referred to as standard variable in this document.
A globalVariable command creates or modifies a variable that « exists » only in the context of the application (will exists in all script context after its creation). It will still exist after a script ends and until LoopToGo close. A global variable can be used to keep a state. For example, a script could have different behavior upon it is run for the firs time, the second time, etc. A global variable can also be used to exchange information between scripts. For example, a script that starts a repetitive action in a while loop and another script that stops the action by changing the condition of the while loop. Warning: one of the « wait » commands must be used inside the while loop otherwise, the other script might not be called (see the while section for more details).
A parentVariable command creates or modifies a variable that « exists » in the context of the parent script and all its children if any. It is useful for returning values to its parent. A child script is created either by using the loadScriptDynamic command or the callFunction command. See more details in the function section.
Note that many other commands will also create variables as a way of getting information. These will be equivalent to standard variables.
Contrary to the alias command, the evaluation of a variables is done at runtime. It is « technically » slower that an alias for scripts that are loaded in memory. The variable is preceded by the dollar sign ($) or the at symbol (@) when used but not when created. The variable and globalVariable commands take 1 mandatory argument (the value) and 1 optional argument (quantization). You have to use the quote marks if the value argument contains spaces. Example:
Input
variable var1 Hi
variable var2 "Hello word!"

print $var1
print $var2
print $var1 "my friend!" $var2
Output
Hi
Hello word!
Hi my friend! Hello word!
A variable can be reinitialized many times using the variable command. A variable that has not been initialized will be replaced by 0:
Input
variable var1 1
variable var1 "A sentence"
variable var1 "Another sentence"

print $var1
print $var2
Output
Another sentence
0
The dollar symbol can be used many times to solve variables. Example:
Input
variable myVariable "My first variable"

variable v1 myVariable

print $v1
print $$v1
Output
myVariable
My first variable
Here are some examples with quantization:
Input
variable v1 2.76 1
variable v2 2.76 .5
variable v3 2.76 .25

print $v1
print $v2
print $v3
Output
2.000000
2.500000
2.750000
Here is an example showing the difference between the variable command and the globalVariable command. The following script is run three times to show that the global variable is persistent.
Input
if $var
	variable var $var + 1
else
	variable var 1
endIf

if $gVar
	globalVariable gVar $gVar + 1
else
	globalVariable gVar 1
endIf

print var : $var
print gVar : $gVar
Output
// First run
var : 1
gVar : 1
// Second run
var : 1
gVar : 2
// Third run
var : 1
gVar : 3 Difference between the dollar sign ($) and the at symbol (@)
The ‘at symbol’ (@) is used to split a string variable into many values using the space as a separator. This could be useful in some occasions. For example, to extract a part of a string or when receiving a string as argument in a script or a function.
Here is an example showing the difference between the variable command and the globalVariable command. The following script is run three times to show that the global variable is persistent.
Input
variable list "1 2.3 Hello world!"

print list : $list  // 1 argument
print list : @list // 4 arguments

forEach element @list
    print element : $element
endForEach
Output
list : 1 2.3 Hello world!
list : 1 2.3 Hello world!
element : 1
element : 2.3
element : Hello
element : world!
System variables
System variables are internal variables that are defined at runtime when a command is executed. Examples of these variables are script arguments and looper states such as the Song bar value. Appendix B lists all system variables. Don’t hesitate to contact us to suggest new system variables to add to the list if needed.
Note that system variables are read only variables. Setting it to a new value will have no effect!
Example:
Input
print Song tempo is $tempo BPM

variable tempo 100 // This has no effect!

print Song tempo is $tempo BPM
Output
Song tempo is 120.000000 BPM
Song tempo is 120.000000 BPM
Algebraic operations
The four main algebraic operation are supported in LoopToGo scripting language : multiplication (*), division (/), addition (+) and subtraction(-). Multiplication and division have greater priority than addition and subtraction. See all the priority order in the section « Order of execution » below.
It is important to note that text, text variables and undefined variables are interpreted as 0 (zero) in algebraic operations.
Also, a division by 0 will be replaced by the text #DIV/0 which could be interpreted as 0 in the remaining operations.
Examples:
Input
print 1 + 2

print 1 + 2*3

print 12/3 - 6/2
Output
3
7
1
variable var1 3.5
variable var2 "Hello"
print 1 + $var1
print 1 + var1
print 2*$var1
print 1 + $var2
print 1 + var2
print 2*$var24.5
1
7
1
1
0print 2.5/0
variable var1 3/0
print $var1
print $var1 + 2#DIV/0
#DIV/0
2
Note: As for release 2.3.0 negative numbers can only be created as a result of an operation. Otherwise, the results are inconsistent. We suggest using 0-x to create negative number -x. This issue might be fixed in future releases but using 0-x to create -x will still be valid.
Input
variable neg2 0-2

print 1.5*$neg2

print 3 + $neg2

print $neg2 + $neg2
print $neg2*$neg2
Output
-3
1
-4
4
Concatenation operator
The ampersand symbol (&) is used for concatenation. The result will be a text that could still be interpreted as a number if possible. Examples
Input
print Hello World
print Hello & World

variable v1 Live
variable v2 Looping

print $v1 $v2
print $v1 & $v2

print 3 & 0
print 2 * 3&0
Output
Hello World
HelloWorld
Live Looping
LiveLooping
30
60
The « namespace » and « namespaceEnd » commands
The LoopToGo scripting language incorporates the namespace concept commonly found in most programming languages. This represents an advanced concept, and we recommend skipping this section if you are just beginning to use LoopToGo’s scripting language. The primary purpose of employing this concept is to resolve naming conflicts when utilizing script libraries. Please note that employing the namespace concept may lead to a slight performance loss for your script.
The namespace concept allows users to organize and encapsulate variables, aliases, and functions within distinct containers. To create a namespace, the « namespace » command is employed, specifying the desired namespace name, and it concludes with the « endNamespace » command. This organizational structure helps avoid naming conflicts and enhances code modularity. Accessing elements within the same namespace requires no special syntax. However, when accessing variables, aliases, or functions from the global namespace, users can use the format $NamespaceName::ElementName, simplifying cross-namespace interactions. For instance, if the namespace is « MyNamespace » and the variable is « loopLength, » accessing it globally would involve using $MyNamespace::loopLength.
Input
variable myVar 1.5

namespace MySpace
    variable myVar 2.2
    print "1 myVar :" $myVar
endNamespace

print "2 myVar :" $myVar
print "3 MySpace::myVar :" $MySpace::myVar
Output
1 myVar : 2.2
2 myVar : 1.5
3 MySpace::myVar : 2.2
Different namespaces can be nested within each other if wanted.
Input
variable myVar 1.5

namespace Sp1
    variable myVar 2.2
    print "1 myVar :" $myVar

    namespace Sp2
        variable myVar 3.7
        print "2 myVar :" $myVar
    endNamespace

endNamespace

print "3 myVar :" $myVar
print "4 Sp1::myVar :" $Sp1::myVar
print "5 Sp1::Sp2::myVar :" $Sp1::Sp2::myVar
Output
1 myVar : 2.2
2 myVar : 3.7
3 myVar : 1.5
4 Sp1::myVar : 2.2
5 Sp1::Sp2::myVar : 3.7
To access an element (alias, variable, or function) defined in the global namespace from within a namespace, precede the element by two colons (::).
Input
variable myVar 1.5

namespace Sp1
  variable myVar 2.2
  print "1 myVar :" $myVar
  print "2 ::myVar :" $::myVar

  namespace Sp2
    variable myVar 3.7
    print "3 myVar :" $myVar
    print "4 ::Sp1::myVar :" $::Sp1::myVar
    print "5 ::myVar :" $::myVar
  endNamespace
endNamespace
Output
1 myVar : 2.2
2 ::myVar : 1.5
3 myVar : 3.7
4 ::Sp1::myVar : 2.2
5 ::myVar : 1.5
Now, imagine you have two libraries implementing the same functionalities. For instance, you might have a library named providerAUtilities.ltgs and another named providerBUtilities.ltgs, both featuring a function called setPadColor. When using both libraries in the same script, the namespace concept becomes essential to resolve the conflict. Here are some examples (Note that it could also have been possible to create only 1 namespace. The other library would be in the global namespace):
namespace ProviderA
	loadScript providerAUtilities.ltgs
endNamespace

namespace ProviderB
	loadScript providerBUtilities.ltgs
endNamespace

// Here are different ways to call the functions from the libraries above

callFunction ProviderA::setPadColor MidiDeviceFromProviderA 5 15
callFunction ProviderB::setPadColor MidiDeviceFromProviderB 3 32

namespace ProviderA
	callFunction setPadColor MidiDeviceFromProviderA 5 15

	callFunction ::ProviderB::setPadColor MidiDeviceFromProviderB 3 32
endNamespace

namespace ProviderB
	callFunction setPadColor MidiDeviceFromProviderB 3 32

	callFunction ::ProviderA::setPadColor MidiDeviceFromProviderA 5 15
endNamespace
Scripting concepts
Arguments
Passing arguments to a script is the way to add flexibility to the script and make it more reusable. There are 2 types of arguments that can be passed to a script: Standard arguments and User arguments. In both cases, the arguments, if any, are created as variables.
Standard arguments
Standard arguments are the arguments that are written in a dedicated field in the window used for creating or launching the script. The argument field can be found in the Manage Script window, in the Marker window (in the script section), in the Add Script Button window and in the Link Script to Midi or Keyboard Event window.
Standard argument can also be passed to another script using the loadScriptDynamic command or the callFunction command.
Note: Standard arguments can be numbers or text strings
When the script is run, the following variables are created:
- $nbArg : number of standard arguments
- $arg1 : first standard argument, if it exists
- $arg2 : second standard argument, if it exists
- etc.
The following script can be used to display the standard arguments passed to a script. In this example, the argument field was: 5 men are « drinking soda ».
Note the use of 2 dollars symbol in this example to solve a « composed » (arg & $i) variable.
Input
print nbArgs : $nbArgs

for i 1 $nbArgs
  variable arg arg & $i
  print Argument $i is equal to: $$arg
endFor
Output
nbArgs : 4
Argument 1 is equal to: 5
Argument 2 is equal to: men
Argument 3 is equal to: are
Argument 4 is equal to: drinking soda
User arguments
User arguments are numbers typed by the user just before launching a script. The user must type a semi-colon between each arguments. When typing these arguments, they will appear at the bottom right corner of the main window.
User arguments can also be passed to another script using the setUserArgs command before calling the loadScriptDynamic or callFunction command if needed.
Important note: the script as the responsibility to reset the arguments with the command setUserArgs when done with them. Otherwise, the new numbers (or semi-colon) typed by the user will be added to what was typed before (this is generally not what you want).
Important note: User arguments can only be numbers.
Important note: the command setUserArgs must be used once the user arguments are used to clear the users args buffer.
When the script is run, the following system variables are created:
- $nbUserArgs : number of user arguments
- $userArg1 : first user argument, if it exists
- $userArg2 : second user argument, if it exists
- etc.
The following script can be used to display the user arguments passed to a script. In this example, the user type 2;3.5;4 just before calling the script.
Input
print nbUserArgs : $nbUserArgs

for i 1 $nbArgs
  variable arg userArg & $i
  print User arg $i is equal to: $$arg
endFor

// We must reset the args for next use!
setUserArgs
Output
nbUserArgs : 3
User arg 1 is equal to: 2
User arg 2 is equal to: 3.5
User arg 3 is equal to: 4
Comparison operators
The scripting langage supports 3 Comparison operator: lower than (<), greater than (>) and equal (=).
It is important to note that text strings, text variables and undefined variables are interpreted as 0 (zero) in lower and greater comparisons.
It is important to note that undefined variables are interpreted as 0 (zero) in lower and greater comparisons. However, text and text variables are kept as text in equality comparisons (text = 0 will be false).
Examples:
Input
print 1 < 2
print 2 < 1
print 1 < 1

print 1 > 2
print 2 > 1
print 1 > 1
Output
1
0
0
0
1
0
print 1 + 1 < 2 + 1
print 2 + 1 < 1 +1
print 2*1 < 2*21
0
1print text < 1
print $undefinedVariable < 1
print 1/0 < 1 // Note 11
1
1Note 1: This is not as expected because 1/0 is converted to text (#DIV/0) and text is converted to 0 in comparisons other than equal.
Input
print 1 = 1
print 1 = 2
print 1 = text
print text = 0 // Note 2
print $undefined = 0 // Note 3
print Hello! = Hello!
print Hello! = Bye!
variable v1 5
print $v1 = 5
variable v2 "Hello"
print $v2 = 0 // Note 2
Output
1
0
0
0
1
1
0
1
0 Note 2: Text is not converted to 0 in equality tests.
Note 3: Undefined variable are converted to 0 in equality tests
« if », « ifNot » « else » and « endIf » commands
The « if » and « endIf » commands are used to execute a list of commands given a that a condition is true (or false if ifNot is used). The « else » command can be used to execute another list of commands if the condition is false.
Note that 0, text and unset variables are interpreted false. Numbers (and variables) different than 0 are interpreted as true.
Note: Algebric operation or comparator can be used in the condition
Examples:
Input
if 1
	print True
else
	print False
endIf
Output
Trueif 0
print True
else
print False
endIf
ifNot 0
print True
else
print False
endIfFalse
Truevariable value1 3
variable value2 5
if $value1 < $value2
print Value1 is lower than Value2
else
print Value1 is greater than Value2 or equal
endIfValue1 is lower than Value2« for » and « endFor » commands
The « for » and « endFor » commands are used to execute the same list of commands n time. The « for » command takes a minimum of 3 arguments and an optional 4th.
- Argument 1: a variable name
- Argument 2: start value
- Argument 2: end value
- Argument 3 (optionnal): step value (default is 1)
Important: if a for loop is too long, it can use too much CPU and cause glitches in the audio engine or make the user interface freeze. See the « while » section below to learn how to avoid this problem.
Examples:
Input
for iterator 2 5
  print $iterator
endFor
Output
2
3
4
5
for v 1 2 .2
print $v
endFor
1
1.2
1.4
1.6
1.8
2
for v 3 3
print $v
endFor3Note: negative steps are supported but due to the algorithm syntax priority (see above), a negative step must be preceded by 0:
Input
for v 3 1 0-1
  print $v
endFor
Output
3
2
1
« forEach » and « endForEach » commands
The « foreach » and « endForEach » commands are very similar to the « for/endFor » commands but it iterates through a provided list of values. Values can be numbers or strings. The « for » command takes a minimum of 2 arguments and a maximum of 16 (which is LoopToGo maximum number of arguments for a script command)
- Argument 1: a variable name
- Argument 2: value 1
- Argument 3: value 2
- Argument 4: etc.
Examples:
Input
forEach iterator 2 3 4 5
  print $iterator
endForEach
Output
2
3
4
5
forEach v 1 "Hello world!" .2
print $v
endForEach
1
Hello world!
.2
forEach v 3
print $v
endForEach3The « while » and « endWhile » commands
The « while » and « endWhile » commands are used for executing a list of commands until a condition becomes false.
Important: A while loop that never ends might result in LoopToGo freezing or crashing. You have to be careful when using it. Read all this section to learn how to avoid this problem.
Example:
Input
variable iterator 4

while $iterator
    print $iterator
    variable iterator $iterator - 1
endWhile
Output
4
3
2
1
It is crucial to make sure that the condition will eventually become false. Otherwise, the script will never end and use all the CPU making LoopToGo to freeze. Even if a while loop would eventually end, if it’s too long, it can causes glitches to the audio engine or impact the user interface. Finally, one could want to write a script that never ends or stops when the user do a particular action (stops the song for example). The way to make sure that a while loop (also a for loop) does not take all the CPU is to use one of the wait commands in the loop section: waitDelta, waitTilSongBar, waitForSongStop, etc.
Example:
Input
variable iterator 4

// The following loop never ends
// Press the Stop Script button
// in the Transport panel to stop it
while $iterator
	print $iterator
	// wait for 1/10th of a bar
	waitDelta .1
endWhile
Output
4
4
4
4
4
4
4
4
4
Scripts stopped!
The « loadScript » and « loadScriptDynamic »
It is a good practice in programming language to reuse code as much as possible. The way to do it in LoopToGo scripting language is to use the loadScript and loadScriptDynamic. The two commands are very similar and can lead to very similar results but it is important to understand the difference and the context in which one or the other must be used.
Important note: Since Release 2.3.0, the function concept was added to the scripting language. Most of the time, it is a better idea to use the callFunction command instead of loadScriptDynamic. See the « Functions » section for more details.
Similarity: both commands will allow the users to execute commands from another script file.
Differences:
| loadScript | loadScriptDynamic |
| Argument : filename loadScript can not accept arguments other than the filename. However, the child commands can use variables defined by the parent script. | Arguments: filename, [string1, etc.] loadScriptDynamic can accept arguments in addition to the filename. The child commands can use variables defined by the parent script. |
| The filename argument must not be a variable or an expression. It must be a text string or an alias because loadScript is interpreted at load time (before solving the variable). | The filename argument can be a text string, a variable or an alias. loadScriptDynamic is interpreted at runtime. |
| The commands in filename are read at load time and added to the parent script in memory. It is as if the child script was manually inserted in the parent script | The commands in filename are read at runtime: the disk drive is accessed when the parent script reaches the loadScriptDynamic command. |
| If there is a syntax error in the child script, the parent script won’t run | If there is a syntax error in the child script, the parent script will run and stop at the loadScriptDynamic command |
| Variables defined in the child script can be used by the parent script in the following commands | Variables defined in the child script are not seen by the parent script in the following commands |
| To be used when speed is critical | To be used when the filename is a variable or when one needs to pass argument to the child script. |
Order of execution
Here is a table showing the order of execution for a script at load time:
| Checking for loadScript commands and inserting script files if needed |
| Checking for alias commands and replacing text if needed |
| Checking syntax error: stops with an error message if there are unknown commands or mismatch commands (if, for and while) |
Here is a table showing the order of execution for a script at runtime:
| $ | system variable replacement |
| $ or @ | script variable replacement |
| $ or @ | parent script variable replacement |
| $ or @ | global variable replacement |
| & | concatenation |
| * / | multiplication and division |
| + – | addition and subtraction |
| = < > | comparisons |
| arguments | argument split based on space (quoted text is kept as one argument) |
| « | quote removing if necessary |
| command | command interpretation (except for the ones processed at load time) |
Functions (function, endFunction and callFunction commands)
Using the function concept in a script can be very helpful in many ways. First, functions let programmers reuse certain tasks, so they don’t have to rewrite the same code again and again. Second, functions make the code easier to understand by breaking it into smaller, named sections. Lastly, functions make it easier to find and fix errors, making the program more reliable overall.
Note calling a function is like calling another script as one would do with loadScriptDynamic but it’s more efficient because the script commands are already in memory (no need to access the disk). The calling scroipt is consider to be the parent script while the function is considered to be the child script.
To create a function, you simply put some code between the « function » command and « endFunction » command. This is the « function definition ». Here is a first example:
function printHelloWorld

	print "Hello World!"
endFunction
To call the function, use the « callFunction command »:
callFunction printHelloWorldNote that the « function definition » can be anywhere in the script. It does not have to be before the callFunction command. In this example file, most of the time, we define the function first for ease of comprehension but putting all the functions at the end is as good. Also, we suggest that you put frequently used functions in different files and use them with loadScript. This will work as well:
callFunction mySecondFunction

function mySecondFunction
	print "Printed by a function defined after callFunction!"
endFunction
You can pass arguments to a function. Inside the function, you process the arguments the same way you would do it for a script. As a matter of fact, internally, a function is a child script.
function addNumbersAndPrintResult // number1 number2

	if $nbArgs = 2
		print $arg1 "+" $arg2 "=" $arg1 + $arg2
	else
		print "This function takes 2 arguments"
	endIf

endFunction

callFunction addNumbersAndPrintResult 3.4 2.5
The result will be:
3.4 + 2.5 = 5.9It could be useful for a function to return one or many values. This is done by passing variables names to the function. We suggest that you identify in a comment which arguments are inputs and which are outputs. Note that an argument can be both input and output. There is an example below (see incrementCounter).
function addNumbers // number1[In] number2[In] result[Out]

	if $nbArgs = 3
		parentVariable $arg3 $arg1 + $arg2
	else
		print "This function takes 3 arguments"
	endIf

endFunction

callFunction addNumbers 3.4 2.5 answer
print "3.4 + 2.5 =" $answer
Note that we use parentVariable to create the $answer variable. This variable will be accessible by the parent script (the calling script). If we would have used the standard variable command, the variable would have only exist in the function context.
The order of the in and out arguments are not important and can be set to suite the function. For example, here is a function that does not always take the same number of arguments
function quantizeNumbers // quantValue[In] value1[In] result1[out] value2[In] result2[out] ...

	variable nbValues $nbArgs - 1
	variable nbValues $nbValues/2
	variable nbValuesInt $nbValues 1 // Quantized

	if $nbValues = $nbValuesInt	// Make sure we have as many outputs as inputs
		for i 1 $nbValues
			variable indexInput $i*2 		// input starts at $arg2
			variable indexOutput $i*2 + 1	// output starts at $arg3
			variable input arg & $indexInput
			variable output arg & $indexOutput

			parentVariable $$output $$input $arg1  // $arg1 is the quantization numer

		endFor
	else
		print "Numbers of input and output differ!"
	endIf
endFunction

callFunction quantizeNumbers .5 3.2 q1 4.6 q2
print 3.2 quantized to .5 "=" $q1
print 4.6 quantized to .5 "=" $q2

variable quant 1
callFunction quantizeNumbers $quant 3.2 q1 4.6 q2 100.9 q3 100.9 + $quant/2 q4
print 3.2 quantized to $quant "=" $q1
print 4.6 quantized to $quant "=" $q2
print 100.9 quantized to $quant "=" $q3
print "100.9 +" $quant/2 quantized to $quant "=" $q4
The output will be :
3.2 quantized to .5 = 3
4.6 quantized to .5 = 4.5
3.2 quantized to 1 = 3
4.6 quantized to 1 = 4
100.9 quantized to 1 = 100
100.9 + 0.5 quantized to 1 = 101
A function can be called inside a function but you can not define a function inside another function. When calling a function, LoopToGo will search in the current context and if no function is found, it will search in the parent script and its ancestors until a function is found. This means that loadScriptDynamic must not be used to load a « library of functions ». The way to do this is to use loadScript. Note that the script loaded by loadScriptDynamic and its children will have acess to all the parent functions. In the following example, you will see that a function as access to its parentvariables (same as for loadScriptDynamic).
function incrementCounter // cnt [In and Out] increment [In]
	if $nbArgs = 2
		parentVariable $arg1 $$arg1 + $arg2
	else
		print "This function needs 2 arguments
	endIf
endFunction

variable cnt 5
callFunction incrementCounter cnt 2
print cnt "=" $cnt
The output will be :
cnt = 7 Let’s create a function that will call incrementCounter.
function moduloFunction // number [In] modulo [In] result [Out]
	// Warning: very bad implementation of modulo!!! This is just an example

	if $nbArgs = 3

		variable number $arg1
		variable cnt 0
		variable modulo $arg2

		while $cnt + $modulo < $number
			callFunction incrementCounter cnt $modulo
		endWhile

		parentVariable $arg3 $number - $cnt 1 // Quantized to 1

	else
		print "This function needs 3 arguments"
	endIf
endFunction

callFunction moduloFunction 28 8 answer
print 28 modulo 8 "=" $answer
callFunction moduloFunction 107 19 answer
print 107 modulo 19 "=" $answer
The output will be:
28 modulo 8 = 4
107 modulo 19 = 12
When to use loadScript, loadScriptDymanic or callFunction
It is important to understand the difference between loadScript, loadScriptDymanic and callFunction, and when to use them.
loadScript fileName: it is the equivalent of copying the content of file name in the calling script. This is done at loading time and filename can not be a variable. It does not take arguments. Though it would be possible to create variables to emulate arguments passing before the loadScript command, it is reccomanded to use callFunction when arguments are needed. loadScript is ideal for loading a list reusable aliases and function definition.
loadScriptDymanic filename: loadScriptDynamic was implemented before the concept of functions and most of the time, callFunction is a better solution than loadScriptDymanic because callFunction is more efficient (no hard disk access at execution time). But still, there a a few reasons why one would want to use loadScriptDymanic. Because loadScriptDymanic read its file at execution time and accepts a variable as filename, it can be used to load files with different names and/or files with content that can be changed by another application.
callFunction functionName: should be used to reuse code in an efficient way. If the functions are to be used in many scripts, it is suggested to put the function definitions in a separate file and to load it using loadScript
Script timing accuracy
All script are run by an internal timer with a period of 5 ms. The first command will be executed immediately. The other commands will be executed right after the first command unless there is a « wait » command with a non reached condition. Then, every 5ms, the script engine will check if the wait has reached it’s resume condition. If so, the other commands will be executed without delay until another wait command is encounter.
Because of this granularity, some scripts might not behave as expected. For example, the following script will not make the audio engine stops at exactly 2.0 and will not always stop exactly at the same bar.
Input
loadScript aliases.txt

setBar 1.0

play

waitTilSongBar 2.0
stop

print $songBar
Output
// First run
2.010160
// Second run
2.015965
If accuracy is needed and when possible, it is suggested to use temporary marker because their action are done by the audio engine at a higher accuracy. As of release 2.0.0, there are temporary markers for the following actions: Stop, Pause, GoTo. It is also possible to create a temporary Section Marker and use it to jump from or jump to other temporary or normal Section Marker. The previous code can be written to achieve more accuracy. Temporary markers will be shown in green and will be deleted when the song stops.
Input
loadScript aliases.txt

setBar 1.0

addTemporaryStopMarker	2

play

waitForSongStop

print $songBar
Output
// First run
2.000000
// Second run
2.000000 Appendix A – List of commands
| Command | Arguments | Description |
|---|---|---|
| activeAnalyseCpuUsage | bool state | Activate the plugin CPU usage analysis. Usually, it is only active when the CPU window is shown. |
| addChain | string chainName | Add a new chain/track |
| addChangeTempoMarker | float bar, float tempo, float startChangeAtBar | Add a change tempo marker. The change tempo is not implemented yet but the marker will be shown |
| addCustomGridLine | float bar, int thickness, string color | Add a custom grid line at a given bar, a given thickness (in pixels) and a given color. The color can be express in many ways (see https://doc.qt.io/qt-6/qcolor.html). |
| addFunctionMarker | float bar, string scriptName, string functionName [, string arguments [, bool removeAfterAction]] | Add a function marker at a given bar. The markerName will be shown beside the marker in the looper view. The functionName should be in the same script file. The marker will be removed after calling the function if removeAfterAction is different from 0. Note that the function will be detached from its parent script since the marker could exist after the script is completed. Hence, a function can not call another function in the file. The function does not have acess to the variable defined by its parent but have access to the global variables. Hence these markers are used for calling single function. A script marker can be used to call more elaborate script. |
| addFunctionToMarker | string markerID, string functionName, string arguments | Add a function to an existing marker |
| addGoToMarker | float barStart, float barEnd | Add a GoTo marker |
| addJamMarker | float start, string trackNameOrIDOrPosition, [bool startInOverdub, bool lockOtherLoop] | Add a Jam Marker. chainName is used to specify which trak will be used for jamming. chainName can alos be set to "Selected track" or "First empty loop" |
| addMidiMapper | string variable, string midiDeviceFrom, string midiDeviceTo | Create a midi mapper that will redirect all midi input events from midiDeviceFrom so they will be treated as if they were coming from midiDeviceTo. This is done at a low level all loops, plugins, shortcuts and the midi console will received the events as if they were coming from midiDeviceTo. It is also possible to partially map the events. See the other addMidiMapper command which differs only byt its parameters. See also deleteAllMidiMappers. |
| addMidiMapper | string variable, string midiDeviceFrom, int statusFrom, int noteStartFrom, int noteEndFrom, string midiDeviceTo, int statusTo, int noteTo | Same as the other addMidiMapper but is use to filter which events will be redirect. It is also possible to shift the notes. The filterinf is as follow: midiDeviceFrom: midi mapped name of inputs event statusFrom: only these status will be mapped. If set to -1, all status will be mapped noteStartFrom: note lower than this value will be igored. If set to -1, all notes will be mapped noteEndFrom: note higher than this value will be ignore. If noteStartFrom is set to -1, all notes will be mapped midiDeviceTo: events will appears as if they come from this device statusTo: status will be set to this value unless it is set to -1 noteTo: if noteStartFrom is not set to -1, note will be set to the received note plus (noteTo - noteStartFrom). If a note change is not desired, make sure that noteTo is equal to noteStartFrom |
| addPauseMarker | float bar | Add a Pause Marker |
| addPlayLoop | string trackNameOrIDOrPosition, string recordLoopNameOrID, float start, float end, [float delay, float speed, float changeMidiPitch, float midiNoteTranspose] | Adds a play loop to a chain and links it to `recordLoopNameOrID`. To link the loop to a record loop on a different track, use the following syntax: trackName:loopName. If the track name or the loop name contains spaces, enclose the full expression in double quotes, for example: - "Track Name:loopName" - "trackName:Loop Name" - "Track Name:Loop Name" |
| addPlugin | string trackNameOrIDOrPosition, string pluginName | Add a plugin to a chain |
| addRecordLoop | string trackNameOrIDOrPosition, string loopName, float start, float end [, string muteWhileRecordingOrPlaying, string muteWhileRecording] | Add a record loop to a chain. Optionnal: string MutedWhileRecordingOrPlaying (set to "mute" to mute loop while recording or playing), string MutedWhilerecording (set to "mute" to mute loop while recording), |
| addScriptMarker | float bar, string scriptName, string functionName [, string arguments [, bool removeAfterAction]] | Add a script marker at a given bar. The markerName will be shown beside the marker in the looper view. The scriptFileName is the name of the script file relative to default script folder. The marker will be removed after calling the function if removeAfterAction is different from 0. Note that the script will be detached from its parent script since the marker could exist after the script is completed. Hence, a function can not call another function in the file. The function does not have acess to the variable defined by its parent but have access to the global variables. |
| addSectionMarker | float bar,string name, [bool temporary] | Add a section marker. If temporary, marker will be deleted when song stops. |
| addSongLine | string text, int type | Add a line of text to the chords/lyrics document. Possible type values: 0: None, 1: Title, 2: Author, 3: Chords, 4: Lyrics, 5: Comment, 6: Tab, 7: PageChange, 8: Bar |
| addStopMarker | float bar | Add a stop marker |
| addTemporaryFunctionMarker | float bar, string scriptName, string functionName [, string arguments [, bool removeAfterAction]] | Same as addFunctionMarker but the marker will be deleted when the song stops |
| addTemporaryGoToMarker | float barStart, float barEnd, [bool removeAfterAction] | Add a temporary GoTo Marker. It will be deleted when song stops or after action if removeAfterAction is provided and different than 0 |
| addTemporaryLockLoopMarker | string loopID, float bar | Add a temporary lock loop marker at bar. The marker with lock loopID |
| addTemporaryPauseMarker | float bar, [bool removeAfterAction] | Add a temporary Pause Marker. It will be deleted when song stops or after action if removeAfterAction is provided and different than 0 |
| addTemporaryScriptMarker | float bar, string scriptName, string functionName [, string arguments [, bool removeAfterAction]] | Same as addScriptMarker but the marker will be deleted when the song stops |
| addTemporarySectionMarker | float bar,string name, [bool removeAfterAction] | Add a temporary Section Marker. It will be deleted when song stops or after action if removeAfterAction is provided and different than 0 |
| addTemporaryStopMarker | float bar | Add a temporary Stop Marker. It will be deleted when song stops |
| addTrack | string chainName | Add a new chain/track. Same as addChain |
| addVirtualMidiDevice | string midiDeviceName | Create a Virtual MIDI device. The device will be added in the Input and Ouput lists. It will act as a virtual MIDI cable. See help page for more details. |
| alias | string name, string alias | Add an alias. Note: Alias are resolved at script loading time. Use "variable" for a dynamic variable. Note: "alias" are faster than "variable". An alias can be used for a command as well and is used as is (no $ symbol at the beginning) |
| armRampUpRecording | string loopID | Force a ramp up of inputs gain at beginning of a record loop |
| armRecord | [bool unarm] | Arm LoopToGo for recording. Events received just before recording (preRecord time) will be recorded. The command also set the system vraiable $isArmedForRecording to true. If the optional unarm arument is false, LoopToGo will be unarmed for recording and the variable $isArmedForRecording will be set tor false. |
| callFunction | string functionName, [string arg1, string arg2, etc.] | Call a function defines in the same script or in an ancestor script. The function definition can be define anywhere (does need to be before the callFunction command) |
| clearLoop | string loopID [, bool dontAskpermission] | Clears a loop of its MIDI and audio data. If `dontAskPermission` is provided and is non-zero, no confirmation message box will be shown. See also clearSelectedLoop. |
| clearSelectedLoops | [bool doNotAskPermission] | Clear all selected record loops from audio and midi data. If doNotAskPermission is set to something other than 0, loops will be clear without asking the user for comfirmation. See also clearLoop. |
| compareSongs | string song1, string song2 | For developping and testing purpose |
| controlLiveAudioRecorder | string recorderCommand [, float arg] | Send various commands to the Live Audio Recorder. The recorder must have already been launched manually or with the showLiveAudioRecorder script command. Here are possible values for recorderCommand: record, play, stop, enableCycling, disableCycling and seek. When using the seek command, a time value in minutes must also be provided. |
| convertDBToLinear | string variable, float value | Convert value (in DB) to its corresponding linear value and put the result in variable |
| convertDecimalsToHex | string variable, string decimals | Convert one or many decimal values to hex values and put the result in variable. If decimal value are real numbers, only the integer part is used |
| convertLinearToDB | string variable, float value | Convert value (linear) to its corresponding DB value and put the result in variable |
| convertLinearToQuadratic | string variable, float value | Convert value (linear) to its corresponding quadratic value and put the result in variable |
| convertStringToHex | string variable, string inputString | Convert string to a string of all its characters in hexadecimal and put it into variable. |
| createOscConnection | string connectionName, string remoteAddress, int localPort, int remotePort [, bool noErrorMessage] | Create an OSC connection with given parameters. Note that the connection will be "permanent". Use Preferences/OSC to delete the connection. If noErrorMessage is different from 0, failing to create a connection will not show an error message. |
| cutLoop | string loopID, float cutBar [, string firstLoopID[, string secondLoopID]] | Cut a loop at cutbar creating 2 loops. If provided, firstLoopID and secondLoopID will be set as variables |
| deleteAllLoops | Delete all loops | |
| deleteAllMarkers | [int type] | Delete all markers unless type is specified, then, delete all markers of the given type |
| deleteAllMidiMappers | [string midiMapperID] | Delete the midi mapper corresponding to midiMapperID. If midiMapperID is not provided, delete all midi mappers. |
| deleteLoop | string loopID | Delete the specified loop |
| deleteMarker | string markerID | Delete a Marker. Note that a ChordSection marker can not be deleted manually. The chords document must be edited. |
| deleteSelectedLoops | Delete all selected loops | |
| deleteSelectedMarkers | Delete selected markers | |
| deleteTrack | string trackNameOrIDOrPosition, [bool force] | Delete a track (can not be undone). If force is set to 1, the track will be deleted without asking permision to the user |
| deleteVirtualMidiDevice | string midiDeviceName | Delete a Virtual MIDI device |
| disablePluginRecycling | string pluginName | Disables the use of the recycle bin for the specified plugin. This prevents the plugin from being recycled even if “Use recycle bin” is enabled globally. If the global option is already disabled, this command has no effect. See also: enablePluginRecycling |
| doNothing | Do nothing. This is useful when the user want to use an alias to remove commands in the script. For example, all the print commands or a call to a debug function. See the debugUtilities library for example. | |
| duplicateTrack | string trackNameOrIDOrPosition | Duplicate a Track |
| else | Part of the if-else-endIf concept | |
| enablePluginRecycling | string pluginName | Re-enables recycling for the specified plugin. This command is only useful after `disablePluginRecycling` has previously been used for the same plugin. Note: Recycling will only occur if the global option “Use recycle bin” is enabled in Preferences → Plugins. If the global option is disabled, this command has no effect. See also: disablePluginRecycling |
| endFor | Part of the for-endFor concept | |
| endForEach | Part of the forEach-endForEach concept | |
| endFunction | End a function definition block. Part of the function-endFunction concept | |
| endIf | Part of the if-else-endIf concept | |
| endNamespace | Part of namespace and endNamespace concept. Ends the current namespace scope (and return to the prior namespace scope). Namespaces can be nested. See help page for more details. | |
| endScript | Ends a script.Executed at script load time hence, it can not be in a If-else-endIf section. Mainly used for debuging purpose. Use endScriptDynamic instead to conditionaly end a script. | |
| endScriptDynamic | Ends a script. Executed at runtime. Use endScript if you want not to load the remaining commands. | |
| endWhile | Part of while-endWhile concept | |
| execShellCommand | string argument | Similar to execSystemCommand but supports both Windows shell commands (for example: echo, type, or compound expressions using operators like &&, |, and >) and system executables. However, when running executables such as curl, notepad, or other .exe files, it can be slower—especially on the first execution—because it runs through cmd.exe. |
| execSystemCommand | string command | Call a Windows system command. Equivalent to typing a string command in cmd.exe. |
| exitFunction | Exit from a function. Can be use to implement a "switch" fonctionality without using nested if-else-endIf commands | |
| for | string variable, float start, float end, [float step] | Part of the for-endFor loop concept. Assign var to all values from start to end with an increment of step |
| forEach | string variable, string value1, string value2 [float value3 [, etc.]] | Part of the forEach-endForEach loop concept. Assign var to all values. Values can be string, int or float |
| function | string functionName | Start a function definition block. Part of the function-endFunction concept |
| getBankInfo | string variable1, string variable2 | Set variable1 to actualBank and set variable2 to the number of tracks per bank |
| getCharacterAt | string variable, string inputString, int index | Set variable to the nth character of inputString. The nth character is defined by index. Index must be between 1 and the number of character in the string. See getNbCharacters |
| getChordNameAtBar | string variable , float bar | Set variable to chord's name at bar |
| getKaraokeInfo | string variable1, string variable2, string variable3, string variable4, float playhead, int level | Get different information (Section, Chords, Lyrics, Playhead position) in order to setup a karaoke client. The Karaoke interface could be implemented with a OSC client for example(or within the Error/log console). Set variable1 to Section, set variable 2 to chords line, set variable3 to lyrics line and set variable4 to the playhead position in the chords line and the lyrics line. playhead (in bar) is usually the current playhead position (eg. $songBar). Level must be set to 0 for the info at the provided pleahead position, to 1 for the next lines, to 2 for the subsequent set of lines, etc. See oscKaraoke.ltgs script for an example on how to use this function to setup an OSC Karaoke client. |
| getLoopAltName | string variable, string nameOrID | Set variable to a loop alternatove name from its ID (or from its name wich is ironic). Alternative name are possible only for play loops. |
| getLoopChordNameAtBar | string variable , string loopNameOrID, float bar | Set variable to chord's name at bar for a loop |
| getLoopColor | string red, string green, string blue, string loopID | Return the rgb color of a loop |
| getLoopEnd | string variable, string nameOrID | Get loop end from name or ID and assign it to variable |
| getLoopEndOfData | string variable, string loopID | Set variable to the end of an audio recording in a loop (specified by loopID) relative to the start of the loop. The detection threshold is specified by setLoopDataThreshold |
| getLoopIDForTrack | string variable, string trackNameOrIDOrPosition, int n | Assign the loopID of nth Loop of Track to the variable |
| getLoopJamState | string variable, string loopID | Get the loop Jam State and assign it to variable. Jam State can be: CycleNoState = 0, CycleOut = 1, CycleLocked = 8, CycleOutLocked = 9, CycleRepeatRecord = 2, CycleRepeatOverdub = 6, CycleRepeatLocked = 10, CycleResume = 24 |
| getLoopLink | string variable, string loopID | Return linked loop and assign it to variable. If nameOrID is a play loop, this is the corresponding record loop. If nameOrID is a record loop, return the loop's ID |
| getLoopLockState | string variable, string loopID | Get the loop Lock State and assign it to variable. Lock State can be: Unlocked = 0, AudioLocked = 1, MidiLocked = 2, Locked = 3 |
| getLoopName | string variable, string nameOrID | Set variable to a loop name from its ID (or from its name wich is ironic) |
| getLoopNextJamState | string variable, string loopID | Set variable to the next jam state of a loop specified by loopID |
| getLoopOverdubRatio | string variable, string loopID | Get loop overdubRatio from name or ID and assign it to variable. A value of 1 means 100% (no aging), a value of 0.5 means 50%, etc. |
| getLoopStart | string variable, string loopID | Get loop start from name or ID and assign it to variable |
| getLoopStartOfData | string variable, string loopID | Set variable to the start of an audio recording in a loop (specified by loopID) relative to the start of the loop. The detection threshold is specified by setLoopDataThreshold |
| getLoopTrack | string variable, string loopID | Get loop track from name or ID and assign it to variable |
| getLoopType | string variable, string loopID | Get loop type from name or ID and assign it to variable |
| getMainVolume | string variable | Set variable to main volume (linear) |
| getMarkerActiveState | string variable, string markerID | Get the marker Active state and assign it to variable |
| getMarkerBar | string variable, string markerID | Get the marker position (in Bar) and assign it to variable |
| getMarkerName | string variable, string markerID | Get the marker Name and assign it to variable |
| getMarkerParameter | string variable, string markerID, int parameterNumber | Get the a marker parameter and assign it to variable. The parameter number is defined by parameter number. The parameter returned depends on the marker type. 0- position in bar 1- value 1 : bar destination (Goto, Temporary Goto, etc.) 2- value 2: lock other tracks (JamMarker), original bar (ChordSection) 3- value3: start in overdub (JamMarker) 4- is selected 5- Track Name (Jam Marker) 6- Script filename (Script Marker) 7- Arguments (Script Marker) 8- Color 9- Script ID (Script Marker) 10- Marker type (same as getMarkerType) 11- Marker Name |
| getMarkerType | string variable, string markerID | Get the marker type and assign it to variable. Possible Types are: NoType = 0, Start = 1, Stop = 2, Pause = 4, GoTo = 8, ChangeTempo = 16, (for future use) ChangePitch = 32, (for future use) GoToTemporary = 64, EndResumeTemporary = 128, StartJam = 256, Section = 512, ChordsSection = 1024, ExecuteScript = 2048, StopTemporary = 4096, PauseTemporary = 8192, SectionTemporary = 16384 |
| getNbCharacters | string variable, string inputString, int index | Get the number of characters in inputString and assign it to variable |
| getNbLoopsForTrack | string var, string trackNameOrIDOrPosition | Assign the number of loops in a track to variable var. The track can be identified by its name or its position |
| getNbOfSongsInPlaylist | string variable | Set variable to the number of songs in the current selected playlist |
| getScriptState | string variable, string scriptID | Set variable to the current script state. Possible value for script state are: 0 = Script does not exist, 1 = Script Is Inactive, 2 = Script Is Active, 3 = Child Script Is Running (script is waiting for child to terminate) |
| getSongBarBetweenChords | variable barBetweenChords | Set barBetweenChords to the corresponding value in the song configuration (Chord and Lyrics Editor) |
| getSongFirstChordPosition | variable firstChordPosition | Set variable to the corresponding firstChordPosition value in the song configuration (Chord and Lyrics Editor) |
| getSongFromPlaylist | string variable, int songNo | Set variable to the song file name from the play list. |
| getSongSymbol | variable symbol, variable value, variable showSymbol, int noSymbol | Set symbol, value and showSymbol to the corresponding values in the song configuration (Chord and Lyrics Editor) |
| getSongTextScaleFactor | variable textScaleFactor | Set textScaleFactor to the corresponding value in the song configuration (Chord and Lyrics Editor) |
| getTempo | string variable | Set variable to the song tempo |
| getTrackActiveState | string variable, string trackNameOrIDOrPosition | Get the track Active state and assign it to variable |
| getTrackColor | string variable1, string variable2, string variable3, string trackNameOrIDorPosition | Get the RGB color values for a track. Set variable1 to red, set variable2 to green, set variable3 to blue. Value are between 0 and 255 |
| getTrackDisplayState | variable visible | Set visible to 1 if track is visible in the looper view |
| getTrackPosition | string variable, string trackNameOrIDOrPosition | Assign position of the track trackName to variable. The first track is at position 1. If the track does not exist, variable is set to 0. |
| getTrackVolume | string variable, string trackNameOrIDOrPosition | Get a track volume and put it in variable. The volume is on a linear scale (1.0 = 0 dB) |
| getTrackVolumeDB | string variable, string trackNameOrIDOrPosition | Get a track volume in DB and put it in variable. |
| getTrackVolumeFader | string variable, string trackNameOrIDOrPosition | Get a track volume fader and put it in variable. The volume is on a quadratic scale from 0 to 127 where 127 is equivalent to the max scale defined in Preferences/General. |
| getVolumeSliderMaxValue | string variable | Get the maximum value that a volume slider can have and set it to variable. This value is set in Preferences/General. Note that although the user sets the value in decibels (dB), the variable will be in a linear scale. For instance, if the user sets the value to 6 dB, the corresponding variable will be 2. |
| globalVariable | string variable, string value, [float quant] | Create a global variable that will exist for all scripts even when the script that created the variable is done. When creating a variable, you don't add the dollar symbol. The dollar symbol must be put before the variable's name when the variable is used. Many $ symbols can be used to resolve a variable. If quant is provided, will quantize the value assigned to the variable. |
| hideWidget | string oscWidgetAddress | Hide a widget by its oscAddress. Note that this is not related to OSC communication however, to see the OSC address in the widget tooltip, at least one OSC connection has to be defined |
| if | bool condition | Executes commands below until endIF or else if condition is true. Part of the if-else-endIf concept |
| ifNot | bool condition | Executes commands below until endIF or else if condition is false. Part of the if-else-endIf concept |
| jumpTo | float bar, [int keep, [string name ]] | Will set the song bar to the specified bar while playing or recording (briefly showing the temporary Goto Marker). If the song is not playing or recording, a temporary marker will be shown and used when the song will start playing or recording. Hiting the stop button will remove the temporary markerNote that the timing accuracy is not guaranteed. For accurate results, it is better to set a Goto Marker. If keep is set to 1, the goto marker will still be shown after the jump (and deleted when the song stops). If keep is set to 2, the marker will be permanent and not deleted when the song stops. The marker name can be set with the third arguments ()arg2 must be provided then). If name is not set, "jumpTo" will be used. |
| killScript | string scriptIDorScriptFilename | Terminate a running script using its script ID or is filename. Note that when using filename, all the instances of the script will be killed. |
| launchFactoryQmlInterface | string interfaceName [, int option, [, float opacity [, string windowTitle] ] ] | Launch an interface (interfaceName) from the Factory interface folder. interfaceName can be relative or absolute. Posible otpions : {None = 0, AlwaysOnTop = 1, ShowInTab = 2, FitScreen = 4}, default is AlwaysOnTop. Opacity is between 0 (invisible) and 1 (100% opaque), default is 1. windowTilte can be used to set the window title, default is interfaceName |
| launchQmlInterface | string interfaceName [, int option, [, float opacity [, string windowTitle] ] ] | Launch an interface (interfaceName) from the User interface folder. interfaceName can be relative or absolute. Posible otpions : {None = 0, AlwaysOnTop = 1, ShowInTab = 2, FitScreen = 4}, default is AlwaysOnTop. Opacity is between 0 (invisible) and 1 (100% opaque), default is 1. windowTilte can be used to set the window title, default is interfaceName |
| loadChain | string chainFileName [, bool shareChain] | Load a chain from the {user}/Documents/LoopToGo/FxChains folder. If shareChain is different from 0, the chain will be set as shared chain. |
| loadPreset | string presetName | Load a preset as setup with the preset buttons (bottom left corner of the Mixing console). presetName can be the default names (A, B, C or D) or the user defined name (as shown with the button label). |
| loadScript | string filename | Load a script in memory at load script time. This is equivalent to copy and paste the new script code in the calling script where loadScript is. |
| loadScriptDynamic | string filename, [string arg1, etc.] | Load a script in memory at execution time. Slower than loadScript because will access the drive but necessary for passing arguments or acessing variables defines by the parent script. The script will be created in the same namespace as the parent if any. |
| loadSong | string songFilename [, bool force, bool dontAskToSaveCurrentSong [, bool dontAskToUsePreviousAutoSavedSong]] | Load the song specified by songFilename. songFilename can be a relative or absolute path. A relative path will look in {user}/Documents/LoopToGo/Songs. When force is set to a number different from 0, the current song will be close without asking for saving. When dontAskToSaveCurrentSong is set to a number different from 0, the song will be loaded without asking the user to save the current song if it has been modified. When dontAskToUsePreviousAutoSavedSong is set to a number different from 0, the song will be loaded without asking the user to load a previous auto saved song. These 3 parameters must be used carefully. |
| loadTrack | string chainFileName [, bool shareChain] | Load a track from the {user}/Documents/LoopToGo/Tracks folder. If shareChain is different from 0, the chain will be set as a shared track. |
| namespace | string namespaceName | Part of namespace and endNamespace concept. Set the namespace scope to namespaceName. A endNamespace command must be used to end the namespace scope (and return to the prior namespace scope). Namespaces can be nested. See help page for more details. |
| parentVariable | string variable, string value, [float quant] | Create a variable that will exist only in the parent script context. This is useful for returning values to the parent script with the following commands: loadScriptDynamic and callFunction. When creating a variable, you don't add the dollar symbol. The dollar symbol must be put before the variable's name when the variable is used. Many $ symbols can be used to resolve a variable. If quant is provided, will quantize the value assigned to the variable. |
| persistentVariable | string variable, string value, [float quant] | Same as globalVariable, however, the created variable will keep existing even after LoopToGo is closed and restarted. |
| playMidi | string midiMappedName, int msg, int note, int velocity | Simulate a generic msg from a midi device. |
| playMidiNoteOff | string midiMappedName, int note | Simulate a midi noteOff msg from a midi device |
| playMidiNoteOn | string midiMappedName, int note, int velocity | Simulate a midi noteOn msg from a midi device |
| string s1, [string s2, etc] | Print a msg in the Error/Log console. Note: the message display can be delayed because messages are put in a queue and then displayed by a timer. To know the exact time the script execute the print command, you can tun on timestamping with setTimeStampOn. | |
| printCpuUsage | For developping and testing purpose | |
| printInBlockingMessageBox | string s1, [string s2, etc] | Display the specified strings in a dialog box. This function will pause the script execution until the user presses "OK" before proceeding with the next commands (blocking). See also printInMessageBox |
| printInInformationLabel | string arg1, [string arg2, []] | Will print all arguments to the Information label (right-bottom of main screen) |
| printInMessageBox | string s1, [string s2, etc] | Display the specified strings in a dialog box. The dialog box is non-blocking, allowing the script to continue execution without waiting for user input. See also printInBlockingMessageBox. |
| printSystemVariables | [bool nameOnly] | Print the list of system variables in the console with their corresponding value. If nameOnly is different from 0, only the names are printed |
| printSystemVariables | [bool nameOnly] | Print the list of all system variables with their current value. If nameOnly is provided and different from 0, then the list is printed without the current values. |
| printTemporaryMessage | string arg1, [float time [float scale]] | Will print argument arg1 in the looper view for time seconds. If time is not provided, will print for 5 seconds. Scale is used to adjust the size of the font. Default is 1.0 |
| quantizeTrack | string trackNameOrIDOrPosition, float bar [, bool quantizeNoteOn, bool quantizeNoteOff, float strength, float humanizeRange, float humanizeBias, float humanizeVelocity] | Set the quantize parameters of a track. chainName and bar must be provided but all the other parameters are optional |
| regexReplace | string variable, string inputString string regexPattern, string regexReplace | Set variable equal to inputString after applying regularExpression to it. See std::regex_replace for more details on how to use regular expressions. |
| removeAllCustomGridLines | remove all custom grid lines added by addCustomeGridLine | |
| removeCustomGridLine | float bar | remove all custom grid lines added by addCustomeGridLine at the specified bar |
| removeFunctionFromMarker | string markerID | Remove the function associated to a marker. See also addFunctionToMarker and addFunctionMarker |
| removePersistentVariable | string variable | Delete a persitent variable |
| reorderChains | float nbRows | Set the nb of rows displayed in the Chain Editor view. If 0, will redram |
| resetCpuUsage | Reset the CPU usage counter | |
| resetLooperMode | Reset to the previous looper mode (see setLooperMode). This is implemented as a stack. You must call resetLooperMode as many times as you called setLooperMode to return to normal. This is used by interface loopers. | |
| resetOfflineTime | Reset the Offline system time. Only have effects qhen the audio mode is set to offline. This is use mainly for development purpose or deterministic testing of plugins. See also setAudioEngineMode. | |
| resetThresholds | For developping and testing purpose | |
| restartASIODriver | Restart the selected ASIO driver | |
| saveChain | string chainNamePosOrID [, bool force] | Save a copy of a chain in {user}/Documents/LoopToGo/FxChains. Note that the loops are not saved. See saveTrack to save the loops as well. The user will be prompted for confirmation if a file with the same name exist unless force is different from 0. |
| saveSong | string fileName | Save the current song under fileName. fileName cane be absolute or relative. If relative, the song is saved under {loopToGoUserPath}/Songs/fileName |
| saveTestResults | For developping and testing purpose | |
| saveTrack | string chainNamePosOrID [, bool force] | Save a copy of a track in {user}/Documents/LoopToGo/Tracks. Note that the loops and audio/MIDI data are saved. See saveChain to save a chain without saving the loops. The user will be prompted for confirmation if a file with the same name exist unless force is different from 0. |
| selectLiveAudioRecorderOutputs | *list of numerical or string outputs | Depending on the selected output type, a list of port numbers (Physical Outputs), a list of tracks (Track) or a list of mapped outputs (Mapped) must be provided. For Physical and Mapped outputs, the order will determine if the outputs is Left or Right. To skip an output, simply provide 0-1. For example, for physical outputs: selectLiveAudioRecorderOutputs 0 1 0-1 3 will use 0 as left output and 1 and 3 as right ouputs |
| selectLoop | string nameOrID | Select a loop by its name or ID |
| selectMarker | string markerID | Select a marker by its ID |
| selectTrack | string trackNameOrIDOrPosition | Select a Chain/Track by its name |
| sendMidiCC | string midiMappedName, int cc, int parameter | Send a midi Controller msg to a device |
| sendMidiNoteOff | string midiMappedName, float note | Send a midi noteOff msg to a device |
| sendMidiNoteOn | string midiMappedName, float note, float velocity | Send a midi noteOn msg to a device |
| sendMidiPC | string midiMappedName, int pc | Send a midi Program Change msg to a device |
| sendMidiRawBytes | string midiMappedName, string midiRawBytes | Send a midi Raw msg to a device. Can be used to send SysEx message for example. IMPORTANT: user must be aware than sending a wrong message can lead to unknown result. Always read the midi device user manual before using this command. |
| sendOscMessage | string oscConnection, string address [, [type] arg1 [, [type] arg2 [, etc.]]] | Send a OSC message using oscConnection to address with optional arguments arg1, arg2, etc. Argument types are optional and can be string, float or int or their first letter (s, f or i) |
| setAudioEngineMode | int mode | Set the audio engine mode (RealTimeMode = 1, OfflineMode = 2). This is use mainly for development purpose or deterministic testing of plugins. See also resetOfflineTime. |
| setAudioInputs | string trackNameOrIDOrPosition, string input0, string input1 | Set the audio inputs of a chain |
| setAudioOutputs | string trackNameOrIDOrPosition, string output0, string output1 | Set the audio outputs of a chain |
| setAudioTapTo | string trackNameOrIDOrPosition,string tapto0 [, noOutput],string tapto1 [, noOutput], etc. | Set the audio "tap to" for an "Output bus" chain, noOutput is optionnal but must be set to 1, 2 or 3 if provided. 1 means will tap to first output, 2 means will tap to second output and 3 means will tap to both outputs |
| setAutoSavePeriod | float period | Change the current Auto Save Period. A valid period value (same as the one used in Preferences/General) in minutes must be used. The current value can be obtain with the system variable $autoSavePeriod. |
| setAutoTrackBar | bool set | If set is different from 0, the looper view will move to follow the playhead (default behavior). If not the looperview will not follow the playhead. |
| setBar | float bar | Set the actual song bar |
| setBufferTransitionWidth | float samples | Change the number of pixels used to smooth the transition between to consecutive loop. Wrong value could lead to unknown results |
| setChainColor | string trackNameOrIDOrPosition, string c1, string c2, string c3 | Set chain color. Supports different coloring naming convention : rgb, name, qt name. |
| setChainPan | string trackNameOrIDOrPosition, float panValue | Set the pan value of a chain in DB. Tange is -1 (hard left) to 1 (hard right). Warning negative value must be preceded by 0 in LoopToGo script language. Same as setTrackVolumeDB. Same as setTrackPan |
| setChainRecordPlayMonitorMode | string trackNameOrIDOrPosition, int mode | Set the monitor mode for when song is playing or recording. Possible mode value: OnlyInLoopsOrTrackEmpty = 0, AlwaysOnWhilePlaying = 2, InLoopsOrWhileTrackSelected = 3, OnlyInLoops = 4 |
| setChainStopMonitorMode | string trackNameOrIDOrPosition, int mode | Set the monitor mode for when song is stopped. Possible mode value: AlwaysOff = 0, WhileMouseOverWhileStopped = 1, AlwaysOnWhileStopped = 2, WhileTrackIsSelected = 3 |
| setChainType | string trackNameOrIDOrPosition, string type | Set the type for a chain. Type must be one of the following: Standard, OutputBus, MasterBus, OutputToOtherChain or InputBus |
| setChainVolume | string trackNameOrIDOrPosition, float volume | Set the volume of a chain. Same as setTrackVolume. |
| setChainVolumeDB | string trackNameOrIDOrPosition, float volumeInDB | Set the volume of a chain in DB. Warning negative value must be preceded by 0 in LoopToGo script language. Same as setTrackVolumeDB |
| setClearAllLoopsAtStartRecordBar1 | bool enable | Enable (enable is different from 0) or disable (enable equal 0) the parameter "Clear all audio and MIDI loops when recording at begins at bar 1" in Preferences/General |
| setFreeTempoLowerLimit | float bpm | Set free tempo lower limit |
| setFreeTempoMode | float on | Activate the Free tempo mode |
| setGridLinesVisibility | int gridVisilibity | Set the visibility of the standard grid lines. NoneGrid = 0, BarsGrid = 1, TicksGrid = 2, SubTicksGrid = 4, AllGrids = 7 |
| setLiveAudioRecorderDuration | float maxDuration | Set the max duration of the Live Audio Recorder to maxDuration (in minutes) |
| setLogConsoleFont | [string fontName [, int fontSize]] | Set the font used for the Log/Error Console. If no font is provided, the console is resetted to its default font. Note that this change also apply to text already printed in the console |
| setLogConsoleFont | string fontName [, int size] | Set the font used in the error/log console. |
| setLoopAltName | string altLoopName | Change the alternative loop name (play loop only). The alternative loop name of a play loop is shown instead of the corresponding record loop name, except when the mouse is hovering over the play loop. |
| setLoopColor | string nameorID [, string color] | set or unset a loop color. Color must be a string supported by QT QColor object (see QT docuemntation). If color is not provided, the loop color is resetted to its default. |
| setLoopDataThreshold | float threshold | Set the threshold for the detection of start and end of a record loop. Threshold must be between 0 (no sound) to 1 (maximum sound). Threshold is resetted to 0 at each new song. |
| setLoopDelay | sring loopID, float delay | Set the delay of a play loop |
| setLooperMode | int mode | Set the looper view to a different looping mode. This only affects which widgets and panels are shown. The modes are used in a stack system: if you call a mode twice, you must call resetLooperMode twice to return to normal. This is used by interface loopers. Mode values: PreProgramLooping = 0 FreeNoSync = 1 FreeAndSync = 2 |
| setLoopFadeIn | sring loopID, float fadInePerCent [, float startVolume] | Set the fade in loop parameters |
| setLoopFadeOut | sring loopID, float fadeOutPerCent [, float endVolume] | Set the fade out loop parameters |
| setLoopJamState | string variable, string loopID | Set variable to the next jam state of a loop specified by loopID |
| setLoopLockState | string loopNameOrID, int state | Set a look lock state. See getLoopLockState for possible state values. |
| setLoopName | string loopName | Change the loop name (record loop only). |
| setLoopNextJamState | string loopNameOrID, int state | Set the look lock state that will be used when the tick reaches the end of the loop. See getLoopLockState for possible state values. |
| setLoopOverdubRatio | string loopNameOrID, float overdubRatio | Set the overdubRatio of a record loop. A value of 1 means 100%, 0.5 means 50%, etc. |
| setLoopStartAndEnd | string nameOrID, float startInBar, float endInBar | Set loop start and end. Must be done in the same time to avoid loosing audio data if possible |
| setLoopVolume | sring loopID, float volume | Set the absolute volume of a loop. 0 = -inf dB, 1 = 0 dB, etc. |
| setMainVolume | float volume | Set the main volume |
| setMarkerActiveState | string markerID, bool Active | Activate (provided parameter Active is different from 0) or Disable (provided parameter Active is 0) a track (hard mute or bypass according to chain's type). |
| setMarkerBar | string markerID, float bar | Change the position of a marker |
| setMarkerColor | string markerID, string color | Change the color of a marker. The color can be express in many ways (see https://doc.qt.io/qt-6/qcolor.html). |
| setMarkerName | string markerID, string name | Change the name of a marker |
| setMasterTapeContinousRecording | For developping and testing purpose | |
| setMetronomeAllSongsVolume | float volume | Set the volume for the metronome for all songs |
| setMetronomeAlwaysOnPlay | float on | Turn the metronome on or off while playing |
| setMetronomeAlwaysOnRecord | float on | Turn the metronome on or off while recording |
| setMetronomeFirstTickFile | float file | Select the metronome first tick file |
| setMetronomeNbTickAfterPlay | float nbTicks | Set the number of metronome tick after the song start when playing |
| setMetronomeNbTickAfterRecord | float nbTicks | Set the number of metronome tick after the song start when recording |
| setMetronomeNbTickBeforePlay | float nbTicks | Set the number of metronome tick before the song start when playing |
| setMetronomeNbTickBeforeRecord | float nbTicks | Set the number of metronome tick before the song start when recording |
| setMetronomeOtherTicksFile | float file | Select the metronome other tick file |
| setMetronomeVolume | float volume | Set the metronome volume (both play and record) for a song |
| setMidiInputs | string trackNameOrIDOrPosition, string input0, string input1, string input2, string input3 | Set the midi inputs of a chain |
| setMidiOutputs | string trackNameOrIDOrPosition, string output0, string output1, string output2, string output3 | Set the midi output of a chain |
| setMidiPreRecordBar | float bar | Set the midi prerecord time in bar |
| setMuteLoopWhileRecording | string trackNameOrIDOrPosition, string loopName, bool muteWhileRecordingAndPlaying, bool muteWhileRecordingButNotPlaying | Active the "Mute loop while recording" option for a record loop. |
| setOtherChainOutput | string trackNameOrIDOrPosition, string otherChain | Set the outputs for an "Output to other chain" chain. If called without argument, all output selections will be erased |
| setPluginActiveState | string trackNameOrIDOrPosition, string pluginID, bool activeState | Disable or enable a plugin. The plugin will stop being processed. Note that the plugin data are note erased when a plugin is disabled. |
| setPluginParameterPlain | [string TrackNameOrIDOrNumber,] string PluginNameOrID, string ParameterNameOrID, flot plainValue | Set a plugin parameter plain value. The plain value range is defined by the plugin. See the list of plugin parameters by clicking the MIDI button beside the plugin's name. See also setPluginParameterValue. |
| setPluginParameterValue | [string TrackNameOrIDOrNumber,] string PluginNameOrID, string ParameterNameOrID, flot normalizedValue | Set a plugin parameter normalized value. The normalized value range is always between 0.0 and 1.0. See also setPluginParameterPlain. |
| setPrintingErrorOff | Disable the error message printing in the console | |
| setPrintingErrorOn | Enable (default) the error message printing in the console | |
| setPrintingOff | Disabling the print command | |
| setPrintingOn | Enabling the print command (default behavior) | |
| setScriptBar | float bar | Set the value of the scriptBar. The scriptBar is a counter that starts as soon as the script starts. It does not stop when a song is stopped or paused |
| setScriptConcurrencyMode | int mode | Set the script concurent mode. This apply only to script that are started with a midi or keyboard event. Possible values for mode are: 0 = Concurrent (if the script is already running, a new script will be spawned, this is the default behavior) 1 = NoConcurrent1 (Do not start if this script is already running) 2 = NoConcurrent2 (If the script is already running, stop it and start a new script) |
| setScriptName | string name | Set the name to be used with the Stop Scripts button (right-click). If name is empty, the script name is resetted to its default value (usually the script filename). The name is also accessible through $scriptName system variable. Note that it will apply to a script loaded with the loadScript command since it's part of the parent script |
| setScriptStopMode | float mode | If mode = 0, the script is stopped when the Stop Scripts button is pressed. If mode is different from 0, the script is not stopped when pressed on the Stop Scripts button. To stop it, the user has to right click on the Stop Scripts and select it. The item will be shown in italic in the menu with an indication that it must be stopped manually. |
| setSongBarBetweenChords | variable barBetweenChords | Set the corresponding value in the song configuration (Chord and Lyrics Editor) |
| setSongFirstChordPosition | float firstChordPosition | Set the corresponding value in the song configuration (Chord and Lyrics Editor) |
| setSongSymbol | int noSymbol, string symbol, float value, bool showSymbol | Set the corresponding values in the song configuration (Chord and Lyrics Editor) |
| setSongTextScaleFactor | float textScaleFactor | Set the corresponding value in the song configuration (Chord and Lyrics Editor) |
| setStartBar | float bar | Set the start bar (yellow) |
| setTempo | float tempo | Set the tempo |
| setTestName | float name | For developping and testing purpose |
| setThresholds | float thresholds | For developping and testing purpose |
| setTimeStampOff | Disable timestamping for script print message in console (default behavior) | |
| setTimeStampOn | Enable timestamping for script print message in console. | |
| setTrackActiveState | string trackNameOrIDOrPosition or int trackPosition or string ID, bool Active | Activate (provided parameter Active is different from 0) or Disable (provided parameter Active is 0) a track (hard mute or bypass according to chain's type). |
| setTrackDisplayState | string trackNameOrIDOrPosition, bool display | Set the visibility of a track in the looper view |
| setTrackPan | string trackNameOrIDOrPosition, float panValue | Set the pan value of a chain in DB. Tange is -1 (hard left) to 1 (hard right). Warning negative value must be preceded by 0 in LoopToGo script language. Same as setTrackVolumeDB. Same as setChainPan |
| setTrackRecordPlayMonitorMode | string trackNameOrIDOrPosition, int mode | Set the monitor mode for when song is playing or recording. Possible mode value: OnlyInLoopsOrTrackEmpty = 0, AlwaysOnWhilePlaying = 2, InLoopsOrWhileTrackSelected = 3, OnlyInLoops = 4. Same as setChainRecordPlayMonitorMode |
| setTrackStopMonitorMode | string trackNameOrIDOrPosition, int mode | Set the monitor mode for when song is stopped. Possible mode value: AlwaysOff = 0, WhileMouseOverWhileStopped = 1, AlwaysOnWhileStopped = 2, WhileTrackIsSelected = 3. Same as setChainStopMonitorMode |
| setTrackVolume | string trackNameOrIDOrPosition, float volume | Set a track volume. Same as setChainVolume |
| setTrackVolumeDB | string trackNameOrIDOrPosition, float volumeInDB | Set the volume of a chain in DB. Warning negative value must be preceded by 0 in LoopToGo script language. Same as setChainVolumeDB |
| setUserArgs | [string s1] | No args to reset userArgs. S1 must not include space. Use semi-colon to separate many args. S1 will appear at the bottom right of LoopToGo window as if the user entered it. |
| shareChain | string trackNameOrIDOrPosition [, bool force] | Set a chain in shared mode. See help for more details about shared chain. Setting force to a value different from 0 will overwrite an existing chain file without validating with the user. To be used carefully. See also shareTrack. |
| shareTrack | Set a track in shared mode. See help for more details about shared tracks. Setting force to a value different from 0 will overwrite an existing chain file without validating with the user. To be used carefully. See also shareChain. A shared track is similar to a shared chain but it will also share the loops and their audio and/or midi data. Also, shared tracks are saved in a different folder. To have acces to the shared track features in the UI, the user must enabled them in Preferences/General | |
| shortcut | string defaultShortcut | Call a keyboard shortcut. It must be the default shortcut and not the user shortcut. See "user shortcut". |
| shortcutByID | int id | Call a shortcut by its ID number. Warning: negative value must be preceded by 0 in LoopToGo script language! |
| showErrorAndLogConsole | float console | Show the Error/Log console |
| showLiveAudioRecorder | int outputType [, int posX [, int posY [, int width [, int height]]]] | Launch the Live Audio Recorder. outputType an be 0, 1 or 2. 0 will use the default or current mode. 1 will use the Full view mode while 2 will use the Compact view mode posX, posY, width and height are optionnal and can be used to set the top left corner, width and height of the dialog. ) can be used on any of these values to use the default or current value. |
| showWidget | string oscWidgetAddress | Show a widget by its oscAddress. Note that this is not related to OSC communication however, to see the OSC address in the widget tooltip, at least one OSC connection has to be defined. See also hideWidget. |
| skipIfAlreadyLoaded | Will skip the remaining loading of a script if that script was previoulsy loaded by the same | |
| skipIfAlreadyLoaded | Will skip the rest of the file if a script with the same filename was already loaded. | |
| spawnScript | string variable, string filename | The script filename will be spawned (meaning that the parent will not wait child script completion and will continue to run). The child will be independent from the parent (won't have access to parent's variable except global variables) but will inherit the printingIsOn setting and will be created in the same namespace if any. |
| startJamMode | string loopID | Start the jam mode over a record loop specified by loopID |
| unselectAllLoops | Unselect all loops | |
| unselectAllMarkers | Unselect all markers | |
| unshareChain | string trackNameOrIDOrPosition | Unshare a previously shared chain (ussing shareChain) or track (using shareTrack). Note that the chain or track file is not deleted. See help for more details about shared chains and shared tracks. |
| userShortcut | string uShortcut | Call a keyboard user shortcut. A user shortcut is when the user changed the default shortcut or added a shortcut. |
| variable | string variable, string value, [float quant] | Create a variable. When creating a variable, you don't add the dollar symbol. The dollar symbol must be put before the variable's name when the variable is used. Many $ symbols can be used to resolve a variable. If quant is provided, will quantize the value assigned to the variable. |
| variableInputPrompt | string variable, string prompt, [float quant] | Same as variable but a Dialog window will be shown to the user with the prompt and a text field. The variable will be set will be set to a unique string meaning that spaces will be preserved. If quant is provided, will quantize the value assigned to the variable. |
| waitDelta | float deltaBar | Wait for deltaBar. Accurate within a 5 ms margin. There is no garantee that the wait time will be within 5ms, the waiting time will never be shorter than deltaTime. It is recommended to use temporary marker to achieve accurate timing actions. |
| waitDeltaTime | float deltaTime | Wait for deltaTime (in milisecond). Accurate to a maximum of 5 ms margin. It is also recommended to use waitDelta when possible so the script is in sync with the tempo and will be more likely to behave the same when tempo is changed! There is no garantee that the wait time will be within 5ms, the waiting time will never be shorter than deltaTime. It is recommended to use temporary marker to achieve accurate timing actions. |
| waitForScriptCompletion | string scriptIDorScriptFilename | Wait until a script is over. One common use is with spawnScript |
| waitForSection | Wait until the end of the current section (a jump at the current section must be set) | |
| waitForSongPause | Wait until the song is paused | |
| waitForSongStop | Wait until the song is stopped | |
| waitTilNextBar | The script is paused until the playhead reach the next bar. | |
| waitTilNextBeat | The script is paused until the playhead reach the next beat. | |
| waitTilScriptBar | float bar | Wait until the script bar reaches a specific value. It is recommended to use temporary marker to achieve accurate timing actions. |
| waitTilSongBar | float bar | Wait until the song bar reaches a specific value. It is recommended to use temporary marker to achieve accurate timing actions. |
| while | bool condition | Part of while-endWhile concept |
Appendix B – List of System variables
| Name | Description |
|---|---|
| $arg1, $arg2, etc. | Arguments passed to the script or to the function. See also $nbArgs |
| $autoSavePeriod | Auto Save Period as set in Preferences/General |
| $bottomNumber | Denominator of the time signature |
| $cpuUsage | Current CPU Usage of the Audio Engine |
| $currentSection | Section number in which the song tick is in |
| $currentSectionEnd | End of section in which the song start bar is at. In bar. If the section is the last one, this variable will be sectionStart |
| $currentSectionName | Name of section in which the song start bar is at |
| $currentSectionStart | Start of section in which the song start bar is at. In bar |
| $currentThreadId | Thread ID in which the script is running |
| $eventLoopID | ID of the loop that triggered an Enter or Leave event. Only set for script ran by Enter or Leave loop events. |
| $isArmedForFreeTempoRecording | When using free tempo mode, LTg must be "armed" with a first record before the actual record. This is done to avoid latency when preparing a song for recording such as clearing the loops. The variable indicates if ltg is armed for this mode or not |
| $isArmedForRecording | 1 if LoopToGo is armed for recording. Use armRecord to set this variable |
| $isInJamMode | 1 is song is in jam mode, 0 if not |
| $isPaused | 1 if song is paused 0 if song is stopped, playing or recording |
| $isPlaying | 1 if song is playing, 0 if not |
| $isRecording | 1 if song is recording, 0 if not |
| $lastCreatedLoopColor | Color of the last created loop |
| $lastCreatedLoopID | ID of the last created loop (Record or Type). |
| $lastCreatedMarkerID | The last created marker ID |
| $lastCreatedPlayLoopColor | Color of the last created play loop |
| $lastCreatedPlayLoopID | ID of the last created play loop. |
| $lastCreatedRecordLoopColor | Color od the last created record loop |
| $lastCreatedRecordLoopID | ID of the last created record loop. |
| $lastProcessExitCode | Last process exit code after a execShellCommand or execSystemCommand has been used. |
| $loopColorAtPlayHeadList | A semicolon-separated list of loop colors intersecting the playhead. Note: Only one loop is shown per track. |
| $loopEvent | Equal to "Enter" or "Leave". Only set for script ran by Enter or Leave loop events. |
| $loopID1, $loopID2, etc. | ID of the nth loop. See also $nbLoops |
| $mainVolume | Main volume value |
| $markerID1, $markerID2, etc. | ID of the last created marker. |
| $maxCpuUsage | Maximum CPU Usage of the Audio Engine since last reset |
| $namespaceScope | Current namespace scope. Empty if in global namespace |
| $nbArgs | Number of arguments passed to the script or to the function |
| $nbChords | Number of chords in the song |
| $nbLoops | Number of loops |
| $nbLyrics | Number of lyrics line |
| $nbMarkers | Number of Markers |
| $nbOfSelectedLoops | Number of selected loops (equivalent to nbSelectedLoops) |
| $nbPlugins | Total count of plugin instances within the current song. |
| $nbSections | Number of section markers (includes: Section Markers, Chord Section Markers and Temporary Section Markers) |
| $nbSelectedLoops | Number of selected loops (equivalent to nbOfSelectedLoops) |
| $nbSongLines | Number of lines in the Chords/Lyrics Editor |
| $nbTracks | Number of tracks in the song |
| $nbUserArgs | Number of arguments passed to the script by the user (typed just before calling the script and separaeted by a semi-colon, the arguments will appear at the bottom right of the Main window. Arguments can only be numerical values) |
| $nextSection | Section number of the next section destination if any. 0 if no jump is planned |
| $oscFullAddress | The OSC full address used to call a script. This variable is only set when a script was called from an OSC client |
| $oscLevel1, $oscLevel2, etc | Each level of the OSC address used to call a script. This variable is only set when a script was called from an OSC client |
| $oscNbLevels | The number of levels of the OSC address used to call a script. This variable is only set when a script was called from an OSC client |
| $presetName1, $presetName2, $presetName3, $presetName4 | Name of the presets. By default A, B, C and D. If the users renamed them, the user's names will be provided. The Preset buttons (left on the Mixing Console) are used to Set, Recall and rename the 4 presets. |
| $realSysTime | Returns the value of the Windows timeGetTime() function (in mSec). Note that $sysTime is generally preferred for its compatibility with offline mode. $realSysTime can be utilized to measure the actual execution time of an offline script. |
| $scriptBar | Number of bars since the script started. Can be changed with command setScriptBar |
| $scriptFileName | Name of the script file |
| $scriptID | Script ID of the current script |
| $scriptLineNumber | Line number where this system variable is used in a script file. Used for debugging scripts. |
| $scriptLoopID | ID of the loop where the script is defined for an Enter or Leave event. Always equal to $eventLoopID for Record loops. Can be equal to Record linked loop for play loops. See documentation for more details.Only set for script ran by Enter or Leave loop events. |
| $scriptName | Name of the script as set by setScriptName command. If not set, will be the script filename. If loadScript is used, will be the name of the loading script. If in a function, will be a special name with the function name in it. |
| $sectionEnd1, $sectionEnd2, etc. | End of section in bar. If the section is the last one, this variable will be sectionStart |
| $sectionEndList | Coma separeted list of all section ends (bar). Can be used with forEach command |
| $sectionName1, $sectionName2, etc. | Name of section |
| $sectionNameList | Coma separeted list of all section names. Can be used with forEach command |
| $sectionStart1, $sectionStart2, etc. | Start of section in bar |
| $sectionStartList | Coma separeted list of all section starts (bar). Can be used with forEach command |
| $selectedChain | Name of the selected chain (same as $selectedTrack) |
| $selectedLoopEnd | End of selected loop in bar. The first selection is used if more than one selection. |
| $selectedLoopID | ID of the selected loop. The first selection is used if more than one selection. |
| $selectedLoopID1, $selectedLoopID2, etc. | ID of nth selected loop. See also nbSelectedLoops |
| $selectedLoopName | Name of selected loop. The first selection is used if more than one selection. |
| $selectedLoopStart | Start of selected loop in bar. The first selection is used if more than one selection. |
| $selectedLoopTrack | Track name of the selected loop |
| $selectedLoopType | Type of the selected loop |
| $selectedSectionEnd | End of selected section (first one if many). In bar |
| $selectedSectionName | Name of selected section (first one if many) |
| $selectedSectionStart | Start of selected section (first one if many). In bar |
| $selectedTrack | Name of the selected track (same as $selectedChain) |
| $songAuthor | The song author as define in the Chords/Lyrics editor (first line with the Author type) |
| $songBar | The value of the song bar (vertical blue line in the looper view). |
| $songFilename | Current Song's filename |
| $songLine1, $songLine2, etc. | Each song line in the Chords/Lyrics Editor |
| $songLineType1, $songLineType2, etc. | Each song line type in the Chords/Lyrics Editor |
| $songName | Either a songname composed of the title and the author as defined in the Chords/Lyrics Editor or a song name generated from the song filename |
| $songStartBar | The value of the song start bar (vertical yellow line in the looper view). |
| $songStartTick | Same as songStartBar but in ticks |
| $songTick | Same as songBar but in ticks |
| $songTime | Time in milliseconds since the song was loaded, played, or recorded. The timer resets only when one of these three events occurs. |
| $songTitle | The song title as define in the Chords/Lyrics editor (first line with the Tytle type) |
| $sysTime | Number of millisec since LoopToGo application started |
| $tempo | Tempo value |
| $topNumber | Numerator of the time signature |
| $trackColorList | A semicolon-separated list of all track colors. |
| $trackHasRecordLoopList | A semicolon-delimited list of boolean values indicating the presence of a record loop at the current playhead position for each track. |
| $trackID1, $trackID2, etc. | ID of the nth track |
| $trackName1, $trackName2, etc. | Name of the nth track |
| $trackNameColorList | A semicolon-separated list of track colors. |
| $trackNameList | A semicolon-separated list of track names. |
| $userArg1, $userArg2, etc. | Arguments type by the user just before calling the scrript. Argument can only be numerical values. Arguments are separated by semi-colon. See also nbUserArgs |
| $visibleTrackNameList | A semicolon-delimited list of names for all tracks currently visible in the Looper View. |
| $visibleTrackNoList | A semicolon-delimited list of indices for all tracks currently visible in the Looper View. |
Appendix C – Script Examples
Installation instruction : download the zip file above and extract it in {user}/Documents/LoopToGo/Scripts
| Script name | Description | Source |
|---|---|---|
| addLoopsForSelectedTrack.ltgs | Automatically create record and play loops for the selected track using section markers. | Source code |
| addRecordLoop.ltgs | Script to add a record loop with custom start and end | Source code |
| adjustSelectedLoopToSection.ltgs | Adjust sekected loops to fit section | Source code |
| aliases.txt | A list of useful aliases (to use in other scripts) | Source code |
| analysePlayLoopChords.ltgs | Create a report with non corresponding chords between a play loop and its linked record loop | Source code |
| armRecord.ltgs | Arm record. This script should be used with another script (example: recordAfterArmed.ltgs) | Source code |
| autoParamRamp.ltgs | Script to automate a linear change of a plugin parameter value from within a loop. See details in the script. | Source code |
| createLoopForSection.ltgs | Script to add a record loop or play loop and adjust it to the corresponding section | Source code |
| endRecordAndJam.ltgs | Script used to jam over a record loop of any length. To use, create a long record loop (e.g. 30 bars). Start to record. After a few bars, run the script. The record loop will be cut at the next bar. A Play loop and a record loop of same length will be added at the end of the first Record loop. A user arg (number typed before calling the script) can be used to add a mutliple of the first loop. For example, you have a long record loop starting at bar 1, you hit record, then at bar 4.5, you hit 3 then run the script, the first loop will be cut at bar 5 and a 12 bar Play loop will be added at bar 5 as well as a 12 bar Record loop and the jam mode will be enabled at bar 5 | Source code |
| enterLeaveLoop.ltgs | Example of a script called by an Enter or Leave loop event. The script shows how to deal with the system variables and the arguments | Source code |
| ExamplesArturia/jamModeLedArturia.ltgs | Script to use pad Leds to show jam mode state on a Arturia Keylab mkII | Source code |
| ExamplesArturia/tempoLedArturia.ltgs2 | Use the pad leds to create a visual tempo. To use with Arturia Keylab mkII. Improve visual from old script | Source code |
| ExamplesArturia/tempoLedArturiaOld.ltgs | Visual tempo on the KeyLab MkII pads (old version) | Source code |
| ExamplesNovation/jamModeLedNovationLaunchMini.ltgs | Interface to the jam mode (must be used with manageLaunchPadMini.ltgs) | Source code |
| ExamplesNovation/manageLaunchPadMini.ltgs | Interfacing the LaunchPadMini with LoopToGo | Source code |
| ExamplesNovation/midiLedEffects.ltgs | Midi Led effects on the Launchpad Mini MkIII (must be used with manageLaunchPadMini.ltgs) | Source code |
| ExamplesNovation/playMidiLedEffects.ltgs | Play different led effects on the LaunchPAd mini MKIII | Source code |
| ExamplesNovation/playMidiLedEffects2.ltgs | Play different led effects on the LaunchPAd mini MKIII | Source code |
| ExamplesNovation/tempoLedLaunchPad.ltgs | Visual tempo on the LaunchPad Mini MkIII | Source code |
| ExamplesNovation/transportLedLaunchPad.ltgs | Update transport, section and other leds for launchpad. (must be used with manageLaunchPadMini.ltgs) | Source code |
| fadeIn.ltgs | Fade in main volume. To be used with a script marker. | Source code |
| fadeOut.ltgs | Fade out main volume. To be used with a script marker. | Source code |
| helloWorld.ltgs | Simple hello world example | Source code |
| jamTemplate.ltgs | Create a template for jamming. | Source code |
| LooperEmulations/dtOne.ltgs | Looper emulation of a simple one button looper pedal. Each loops have the length of the first loop | Source code |
| LooperEmulations/dtPlus.ltgs | Looper emulation of a simple one button looper pedal. Each loops have the length of the second loop which is a multiple of the first loop. | Source code |
| LooperEmulations/pauseAll.ltgs | Script to be used with looper emulation scripts. Will pause the song at the end | Source code |
| LooperEmulations/resetSong.ltgs | Script to be used with looper emulation scripts. Will delete all markers and loops. | Source code |
| mirrorSong.ltgs | Script to synchornize 2 instances of LoopToGo running on 2 different computers (Chords, Lryrics and Loop are synchronized) | Source code |
| oneButtonJamAndResume.ltgs | Example of using only one midi button to execute many tasks. First run will start recording. Running the script again over a record loop on a selected track will start the Jam session in record mode. Running the script again will resume. This script is useful when you want to jam in a song solo part. | Source code |
| oneButtonJamOverManyTracks.ltgs | Example of using only one midi button to execute many tasks. First run will start recording. Running the script again will start the Jam session in overdub mode over the first track. Record loops on other track will be locked. Running the script again will lock the current jamming loop and switch to record mode over the next track record loop. If using section, double click will make LoopToGo switch to the next section at the end of the current section. Double click many times to select the section you want to jump to. | Source code |
| oneButtonRecordAndJam.ltgs | Example of using only one midi button to execute many tasks. The script will first start recording, then, when over a record loop on the selected track, it will start the jam mode. Calling the script again will browse through the different jam modes. A double click will resume the jamming mode. | Source code |
| oscKaraoke.ltgs | Example script on how to set up an OSC Karaoke client | Source code |
| recordAfterArmed.ltgs | Allow to use a midi note to start recording. Must be used with armRecord.ltgs | Source code |
| sendMidiPC.ltgs | Send midi PC message to a midi device | Source code |
| setLoopEndToCurrentSection.ltgs | Set the selected loop end to a Section marker bar | Source code |
| setLoopStartToCurrentSection.ltgs | Set the selected loop start to a Section marker bar | Source code |
| setMainVolume.ltgs | Set the main volume with a midi knob | Source code |
| setMetronomeVolume.ltgs | Set the metronome volume with a midi knob | Source code |
| stringManipulationsExamples.ltgs | Examples of string manipulations | Source code |
| testArgument.ltgs | Simple script to test user arguments usage | Source code |
| testArgumentReceiver.ltgs | Simple script to test user arguments usage | Source code |
| testUserArgumentReceiver.ltgs | Simple script to test user arguments usage2 | Source code |
Appendix D – Editing Scripts
We suggest that you use Notepad++ for editing LoopToGo’s scripts. An auto-format file as well as an auto-completion file are provided to ease the writing of scripts. These files may be updated with every new LoopToGo releases so make sure to re-install them from time to time.
When the auto-format file is properly imported in Notepad++, the LoopToGo script code should look like this in Notepad++:
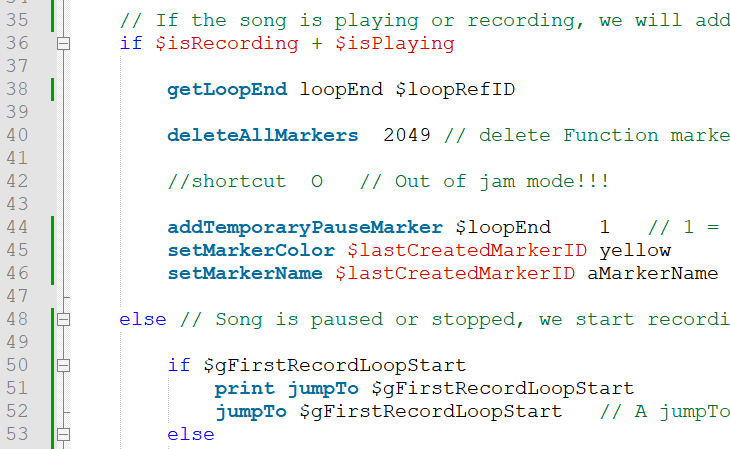
Furthermore, the auto-completion file will give a list of key words from the scripting language to choose from when you start typing.
Installing the auto-format file (UDL)
Download the AllLoopToGoScripts.zip file from the Appendix C and unzip it in the {User}/Documents/Scripts folder. Then, in Notepad++, select Language/User Defined Language/Define your language… Then, click on the Import… button and select the auto-format file: {User}/Documents/LoopToGo/Scripts/LoopToGo/LTGSFormatForNotepad+.xml
The next time you will load a file with the .ltgs extension, it will use this file format. if a file is already loaded in Notepad++ or if you want to use the same formatting for a file with another extension (.txt for example), simply click on Language and select LoopToGoScript.
For the auto-formatting to work, the file your editing must use the LoopToGoScript language. The language used is shown at the left bottom corner of Notepad++.
Installing the auto-completion file
Copy {User}/Documents/LoopToGo/Scripts/LoopToGo/LoopToGoScript.xml into c:/program Files/Notepad++/autoCompletion/ folder (adjust for wherever Notepad++ is installed). The name of the file must not be changed as it is the language name. Restart Notepad++.
For the auto-Completion to work, the file your editing must use the LoopToGoScript language. The language used is shown at the left bottom corner of Notepad++.